For years, Giants Sotware has provided us with "Exporters" for our 3d design software. These allow you to create your so-called “UDIM” textures and export your models to the proprietary i3d format. When we talk about modding, it's a term that often redirects us to the community. And this time, it's not content for the game itself, but beautiful and well an addons module for Blender.
Blender is free software for 3D modeling, animation and rendering (free software available here ).
Posted on the famous GitHub site, the creators share their version of the addon with you for free with all the necessary documentation. Updates are made by following the evolution of the software. We will explain in a few lines how to install the addon on your open source 3D design software.
- Download I3D-Blender-Addon on GitHub, to do this pull down the Code tab and download the zip.
- To facilitate the installation and avoid accidental deletion of the file, we advise you to create a folder in your documents and move the .zip of the addon into it.
- Once your file is in place, you can open Blender in administrator mode. Click on "Edit" then on "Preferences", a new window will open. Click on "Install" and go for the file "I3D-Blender-Addon-master.zip".
- Find in the list "Import-Export: Unofficial GIANTS I3D Exporter Tools" and check the box to activate it.
- Expand the addon to configure its preferences, in the “FS data Folder” line, indicate the location of the “Data” folder of your game:
- Default for Steam version: C: \ Program Files (x86) \ Steam \ steamapps \ common \ Farming Simulator 19 \ data \
- Default for CD version: C: \ Program Files (x86) \ Farming Simulator 19 \ data \
- Save the activation and preferences of your addon. Click on the symbol at the bottom left (represented by 3 horizontal bars) and click on “Save Preferences”.
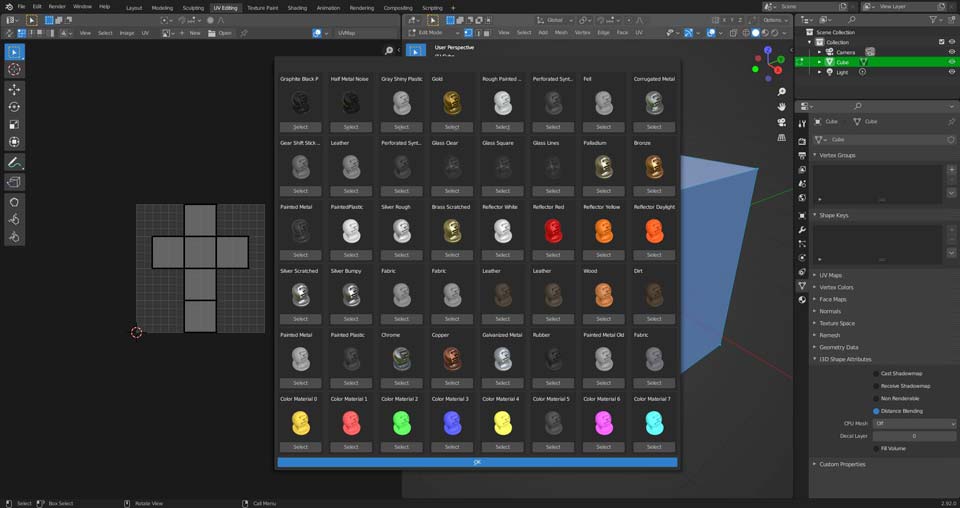
If you have already used the Exporter version of Giants, when you wanted to assign a specific UDIM, you had to open the "material selector" window. With this addon, you will have to use the keyboard shortcut “CTRL + U” to open the panel and section your UDIM.
Your addon is now installed, activated and configured for your Blender. Feel free to take a look for yourself on the developers' GitHub page (and thank them by the way).